Overview
The Identities page is organized into two main tabs with comprehensive functionality:Identities
Create, import, and manage digital identities for Internet Computer development
Ledger
Comprehensive ICP operations including account management, transfers, and transaction history
Identities you create are global and not confined to a specific project context. They can be used across all your Internet Computer projects and are essential for interacting with the IC network.
Identities Management
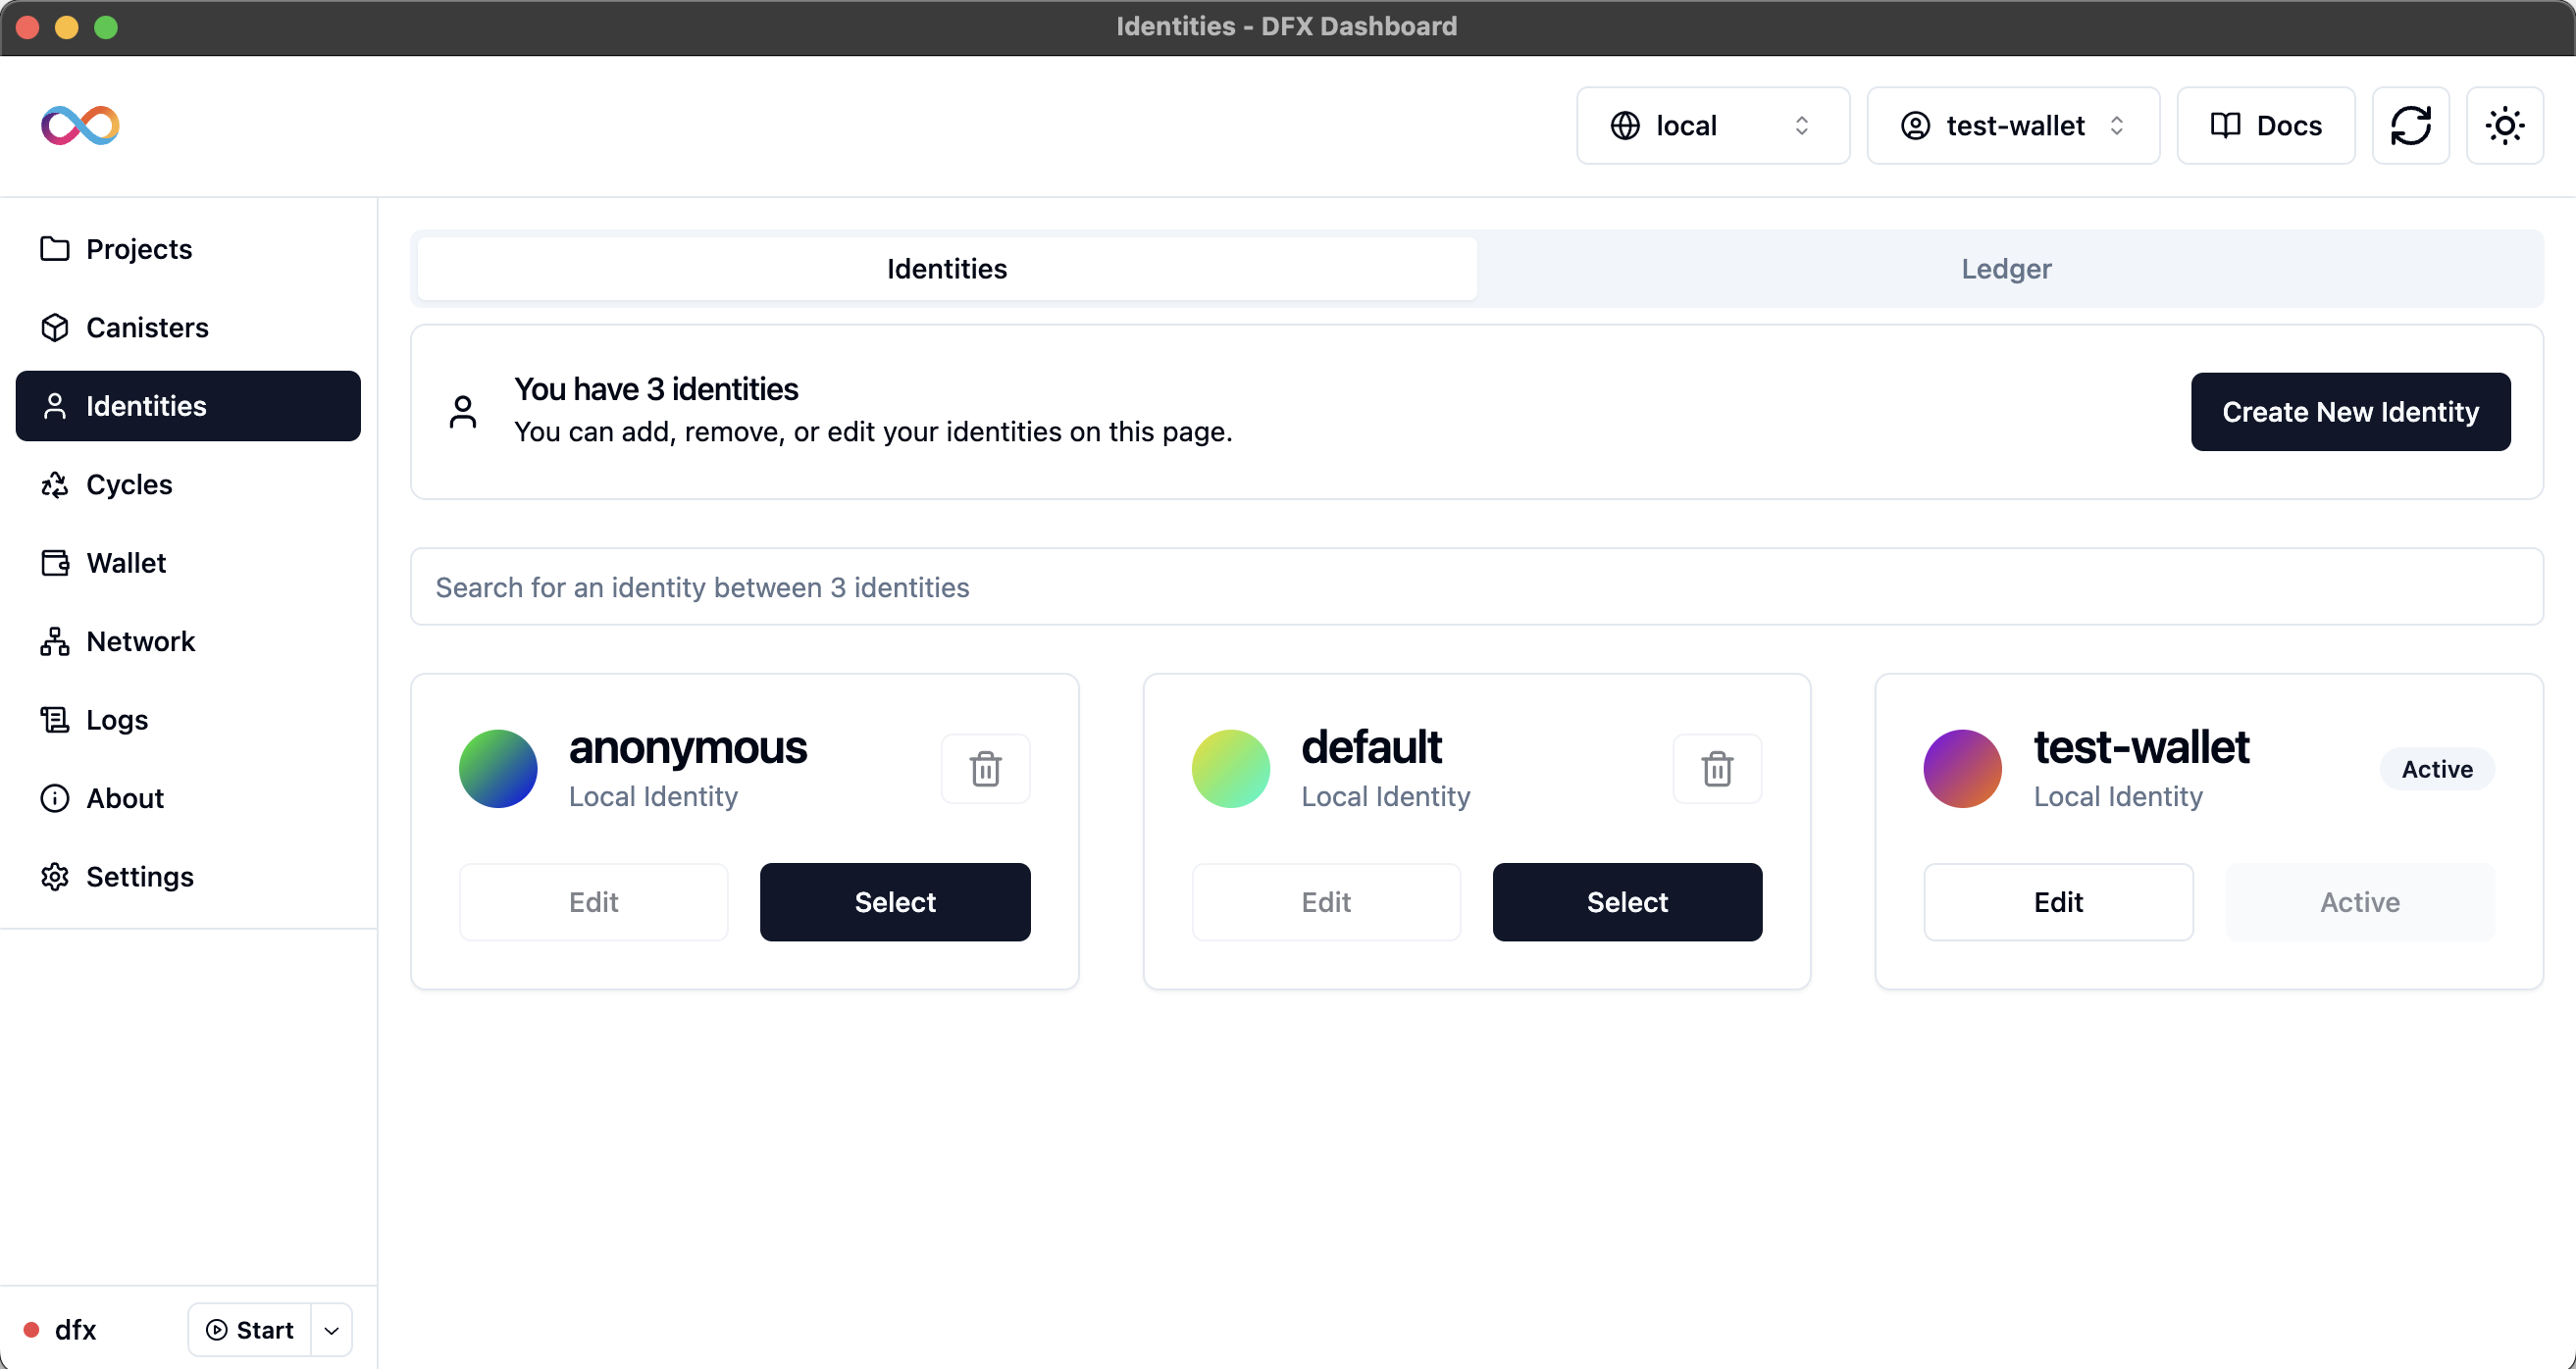
Identity List Features
Identity Count
Displays total number of identities at the top of the page
Search Functionality
Real-time search across all identity names
Grid Layout
Clean 3-column grid layout for easy identity browsing
Identity Card Features
Each identity is displayed as a card with the following information and actions:Identity Information
Identity Information
- Avatar: Unique avatar generated for each identity
- Name: Identity name (truncated for Internet Identity)
- Type: Local Identity or Internet Identity
- Status: Active badge for currently selected identity
Available Actions
Available Actions
- Select: Set identity as active for current session
- Edit/Details: Rename local identities or view Internet Identity details
- Delete: Remove identity (with protection for system identities)
- Protected Identities: “anonymous” and “default” cannot be deleted
Creating a New Identity
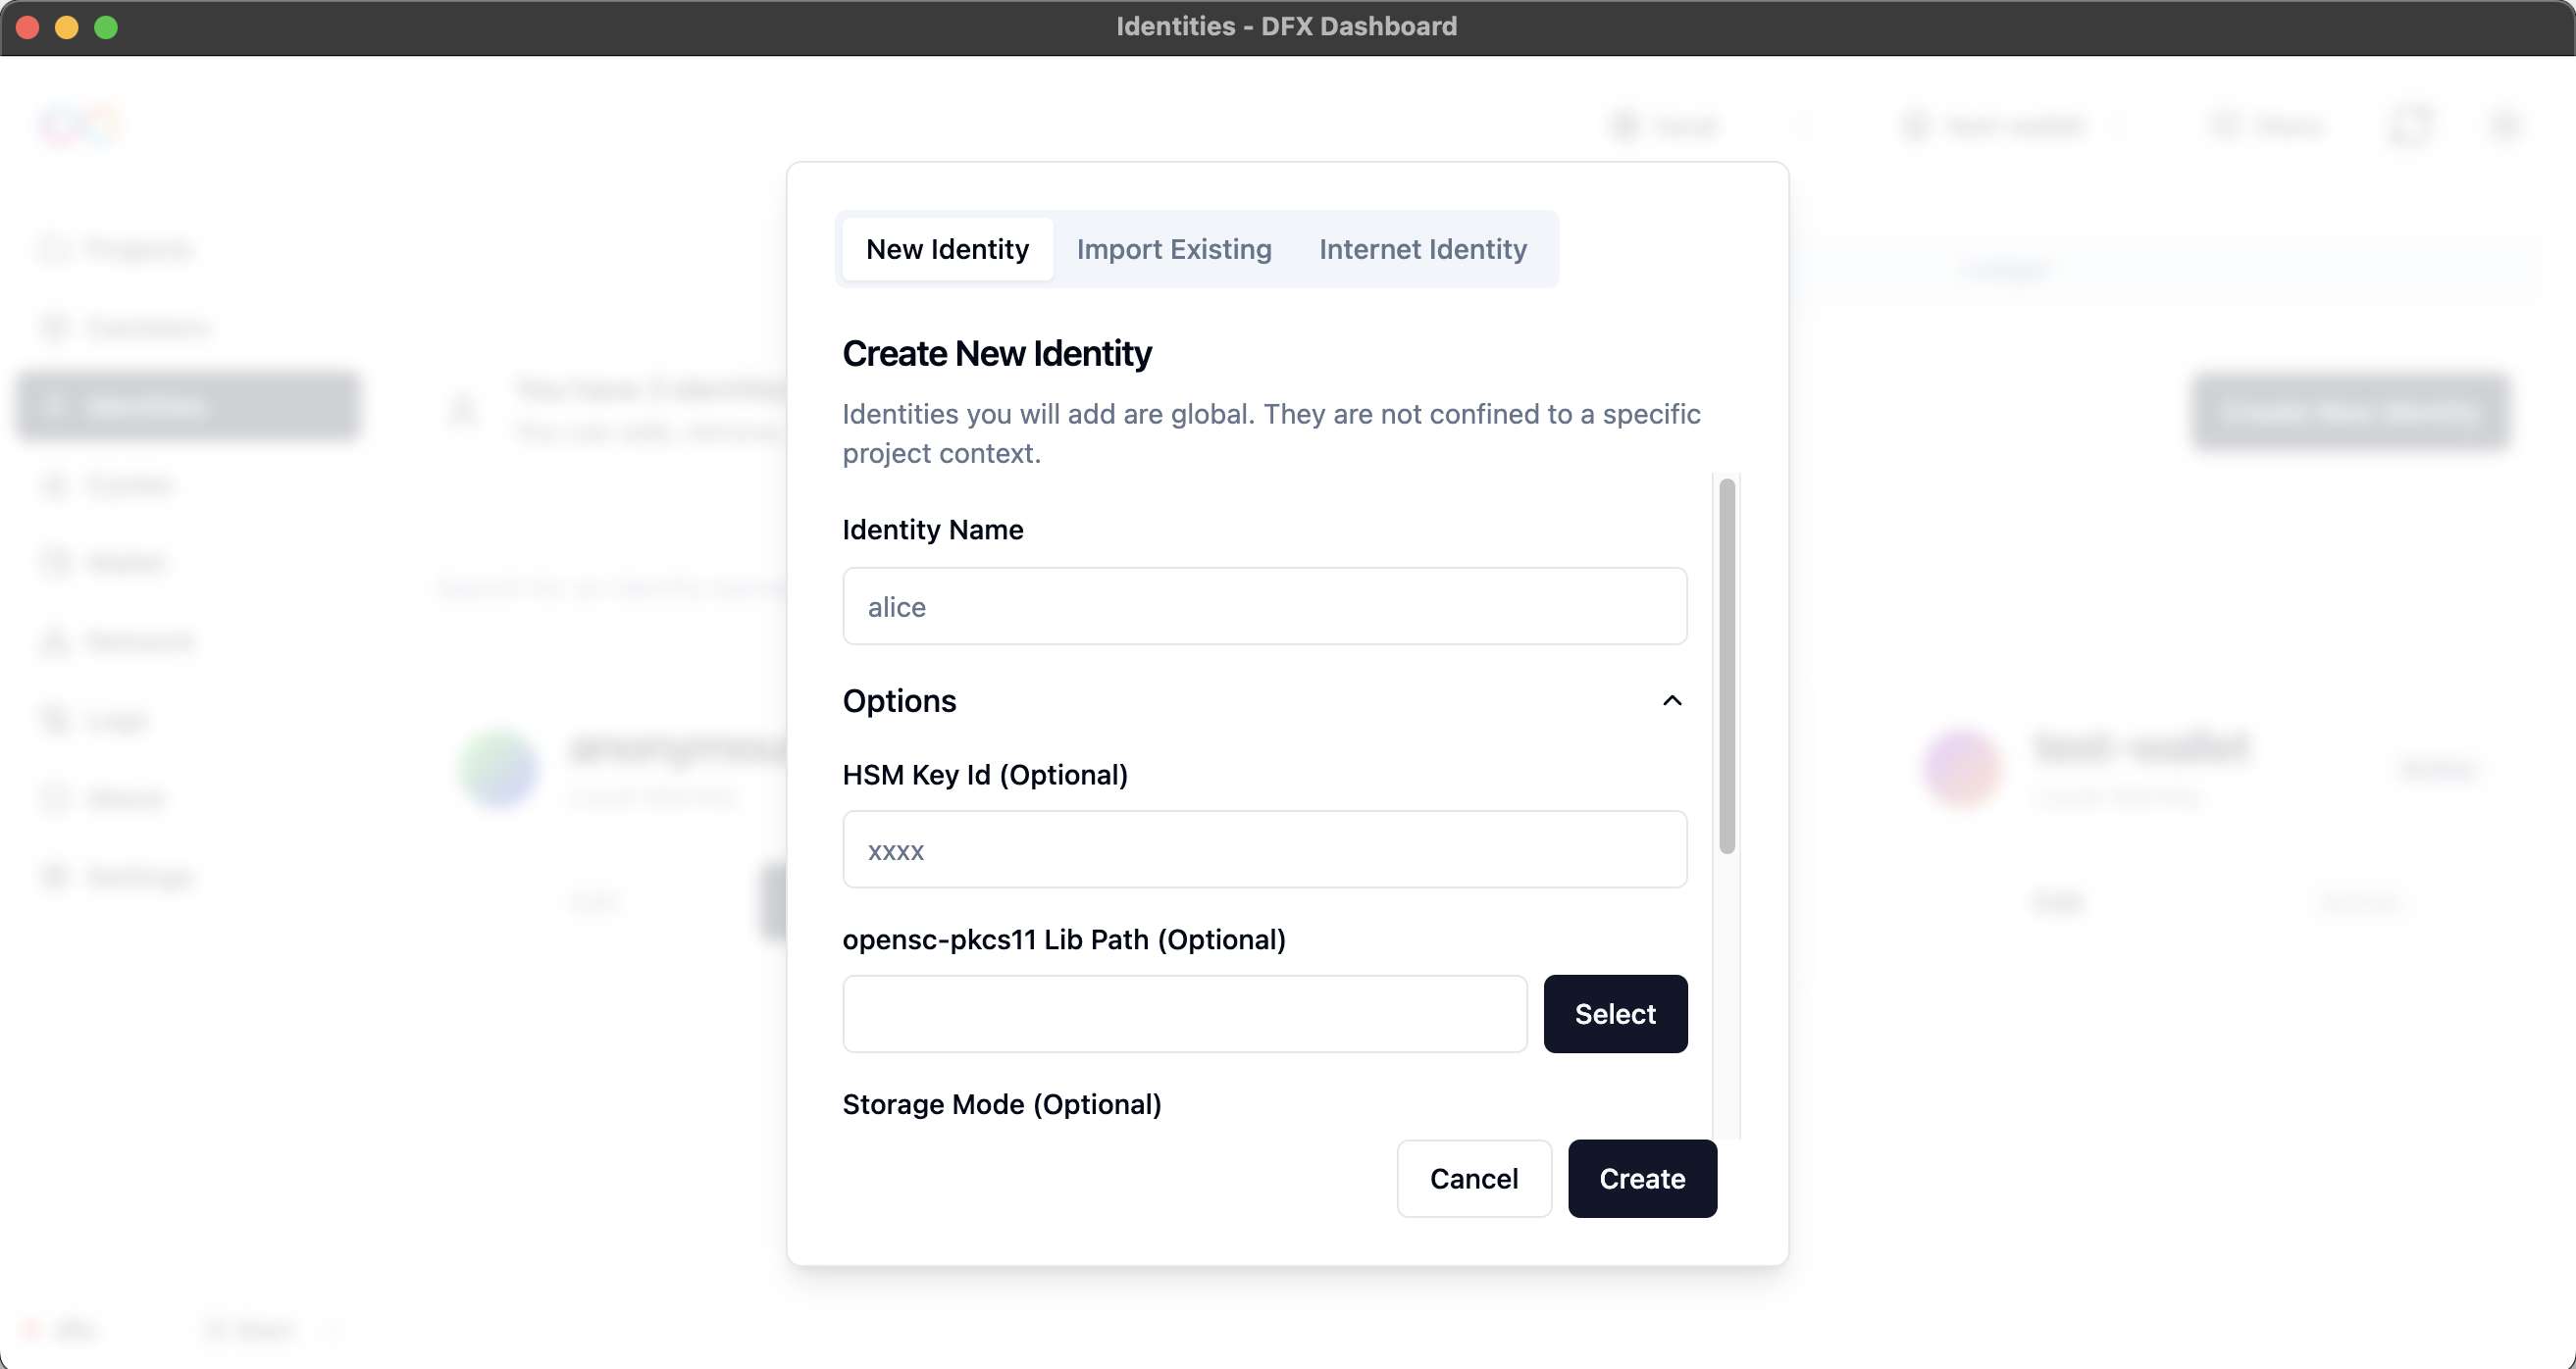
New Identity Tab
Enter Identity Details
- Identity Name: Enter a descriptive name (e.g., “alice”)
- Options: Expand for advanced configuration options
Configure Advanced Options
- HSM Key ID: Hardware Security Module key identifier (optional)
- Storage Mode: Choose password-protected, plain-text, or no storage mode
- Force: Overwrite existing identity if it exists
Importing an Existing Identity
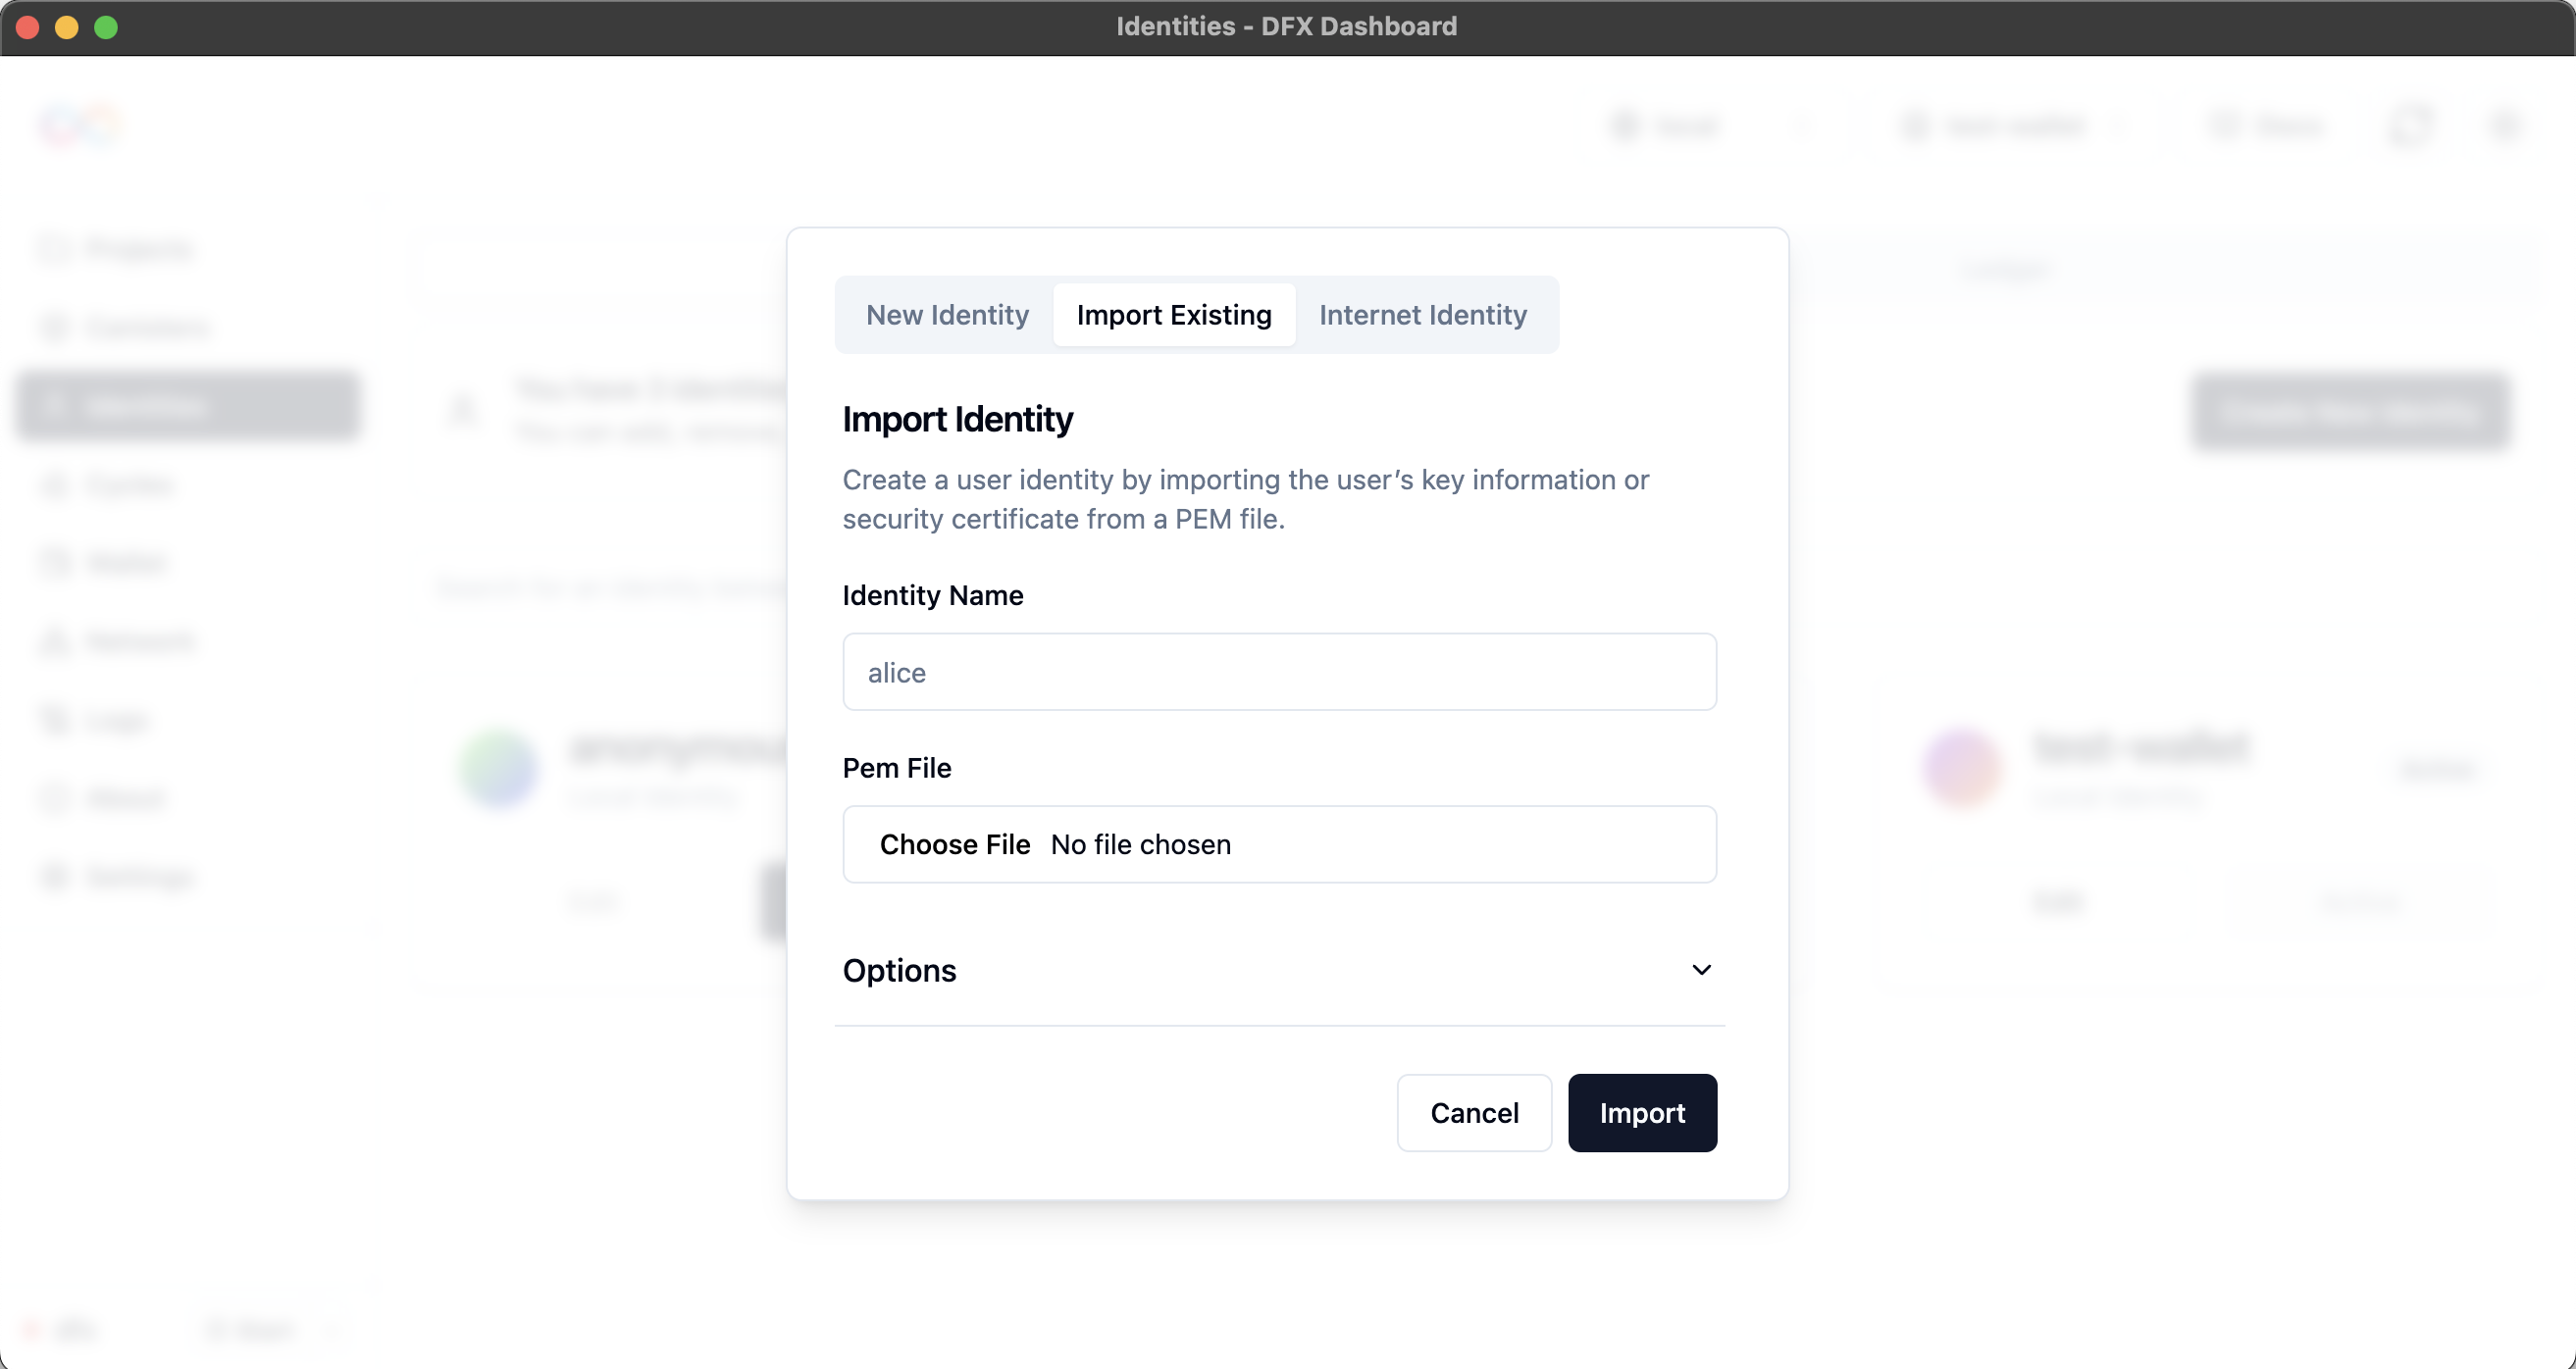
Import Process
Provide Identity Information
- Identity Name: Enter a descriptive name for the imported identity
- PEM File: Select the PEM file containing the identity’s key information
Configure Import Options
- Storage Mode: Choose how the identity should be stored
- Force: Overwrite existing identity if name conflicts occur
Storage Mode Options
Password Protected
Password Protected
- Security: Highest security level with password encryption
- Use Case: Recommended for production and sensitive identities
- Access: Requires password for each use
Plain Text
Plain Text
- Security: Lower security, keys stored in plain text
- Use Case: Development and CI environments
- Risk: Keys are accessible without additional protection
No Storage Mode
No Storage Mode
- Behavior: Uses default dfx storage behavior
- Flexibility: Allows dfx to determine appropriate storage method
Internet Identity Integration
The DFX Dashboard supports Internet Identity for enhanced security and seamless IC integration:Internet Identity Login
Internet Identity provides biometric authentication and device-based security. The login process opens in your browser and automatically creates the identity in DFX Dashboard upon successful authentication.
Ledger Functionality
The Ledger tab provides comprehensive ICP (Internet Computer Protocol) token management through three specialized sub-tabs:Account Management Tab
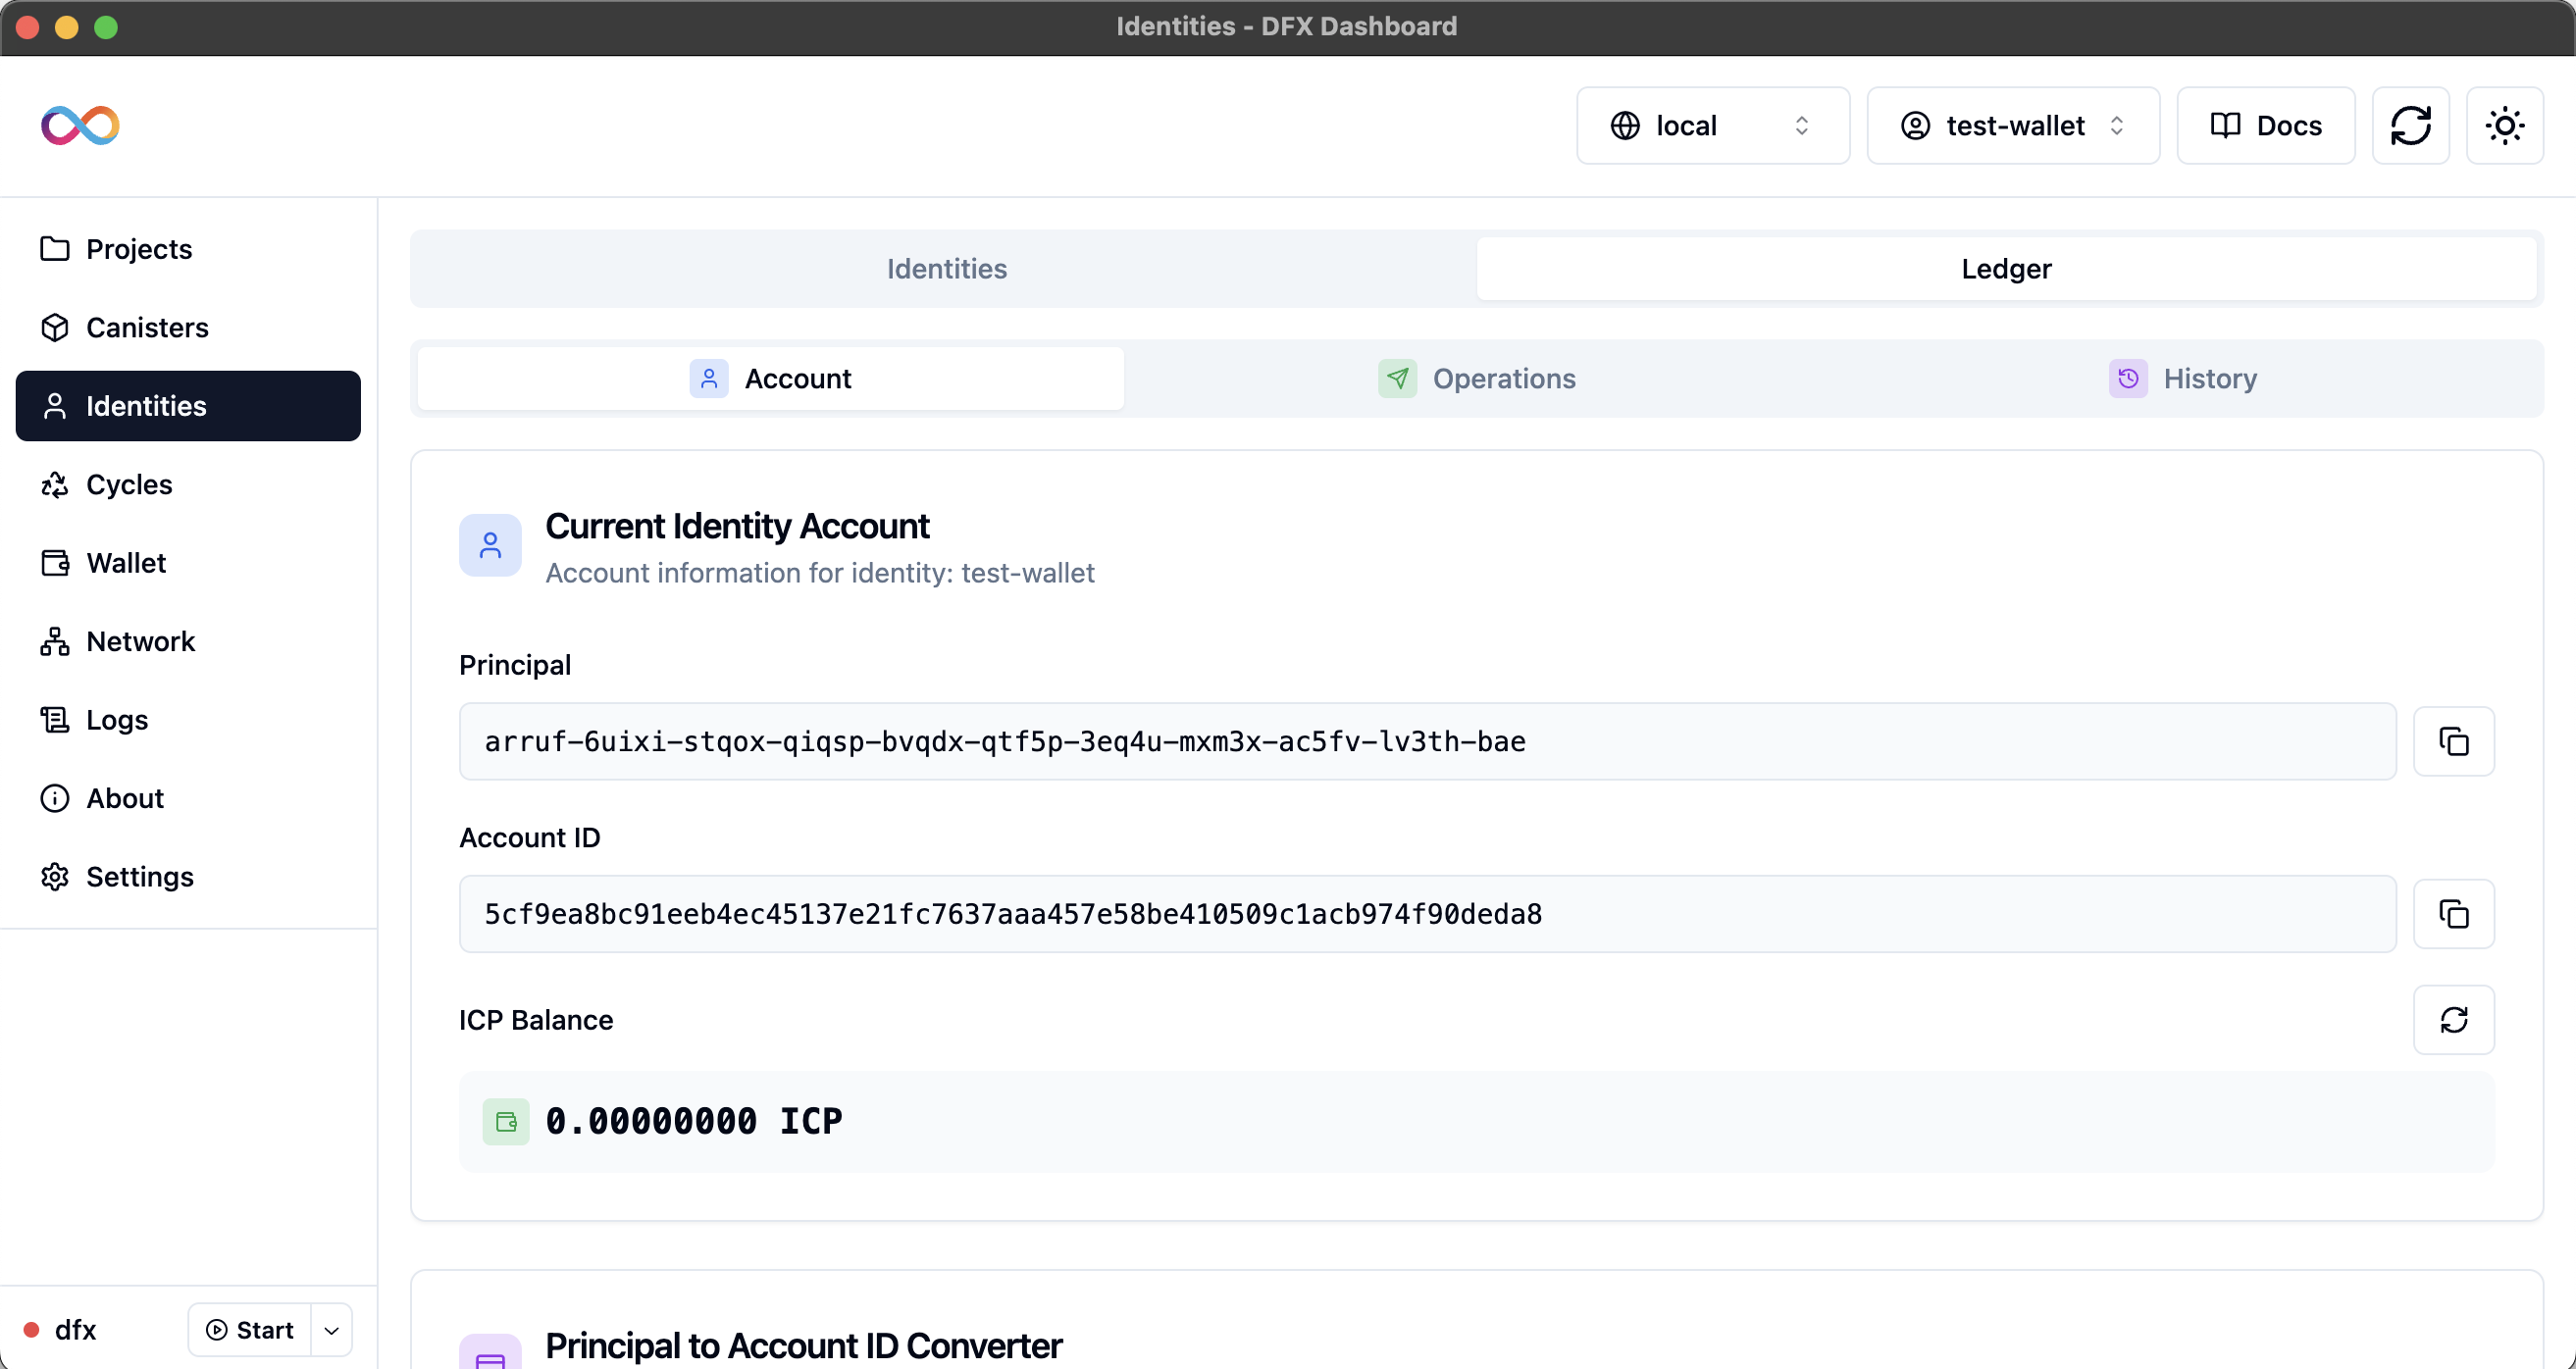
Current Identity Account
Current Identity Account
Account Information Display:
- Principal Display: Shows your current identity’s principal ID with copy functionality
- Account ID: Displays the corresponding account identifier with copy functionality
- ICP Balance: Real-time balance checking with manual refresh capability
- Network Status: Shows which network the balance is fetched from
Principal to Account ID Converter
Principal to Account ID Converter
Conversion Tools:
- Input Field: Enter any principal to convert to account ID
- Validation: Ensures valid principal format before conversion
- Copy Result: One-click copying of converted account IDs
- Batch Processing: Convert multiple principals efficiently
Operations Tab
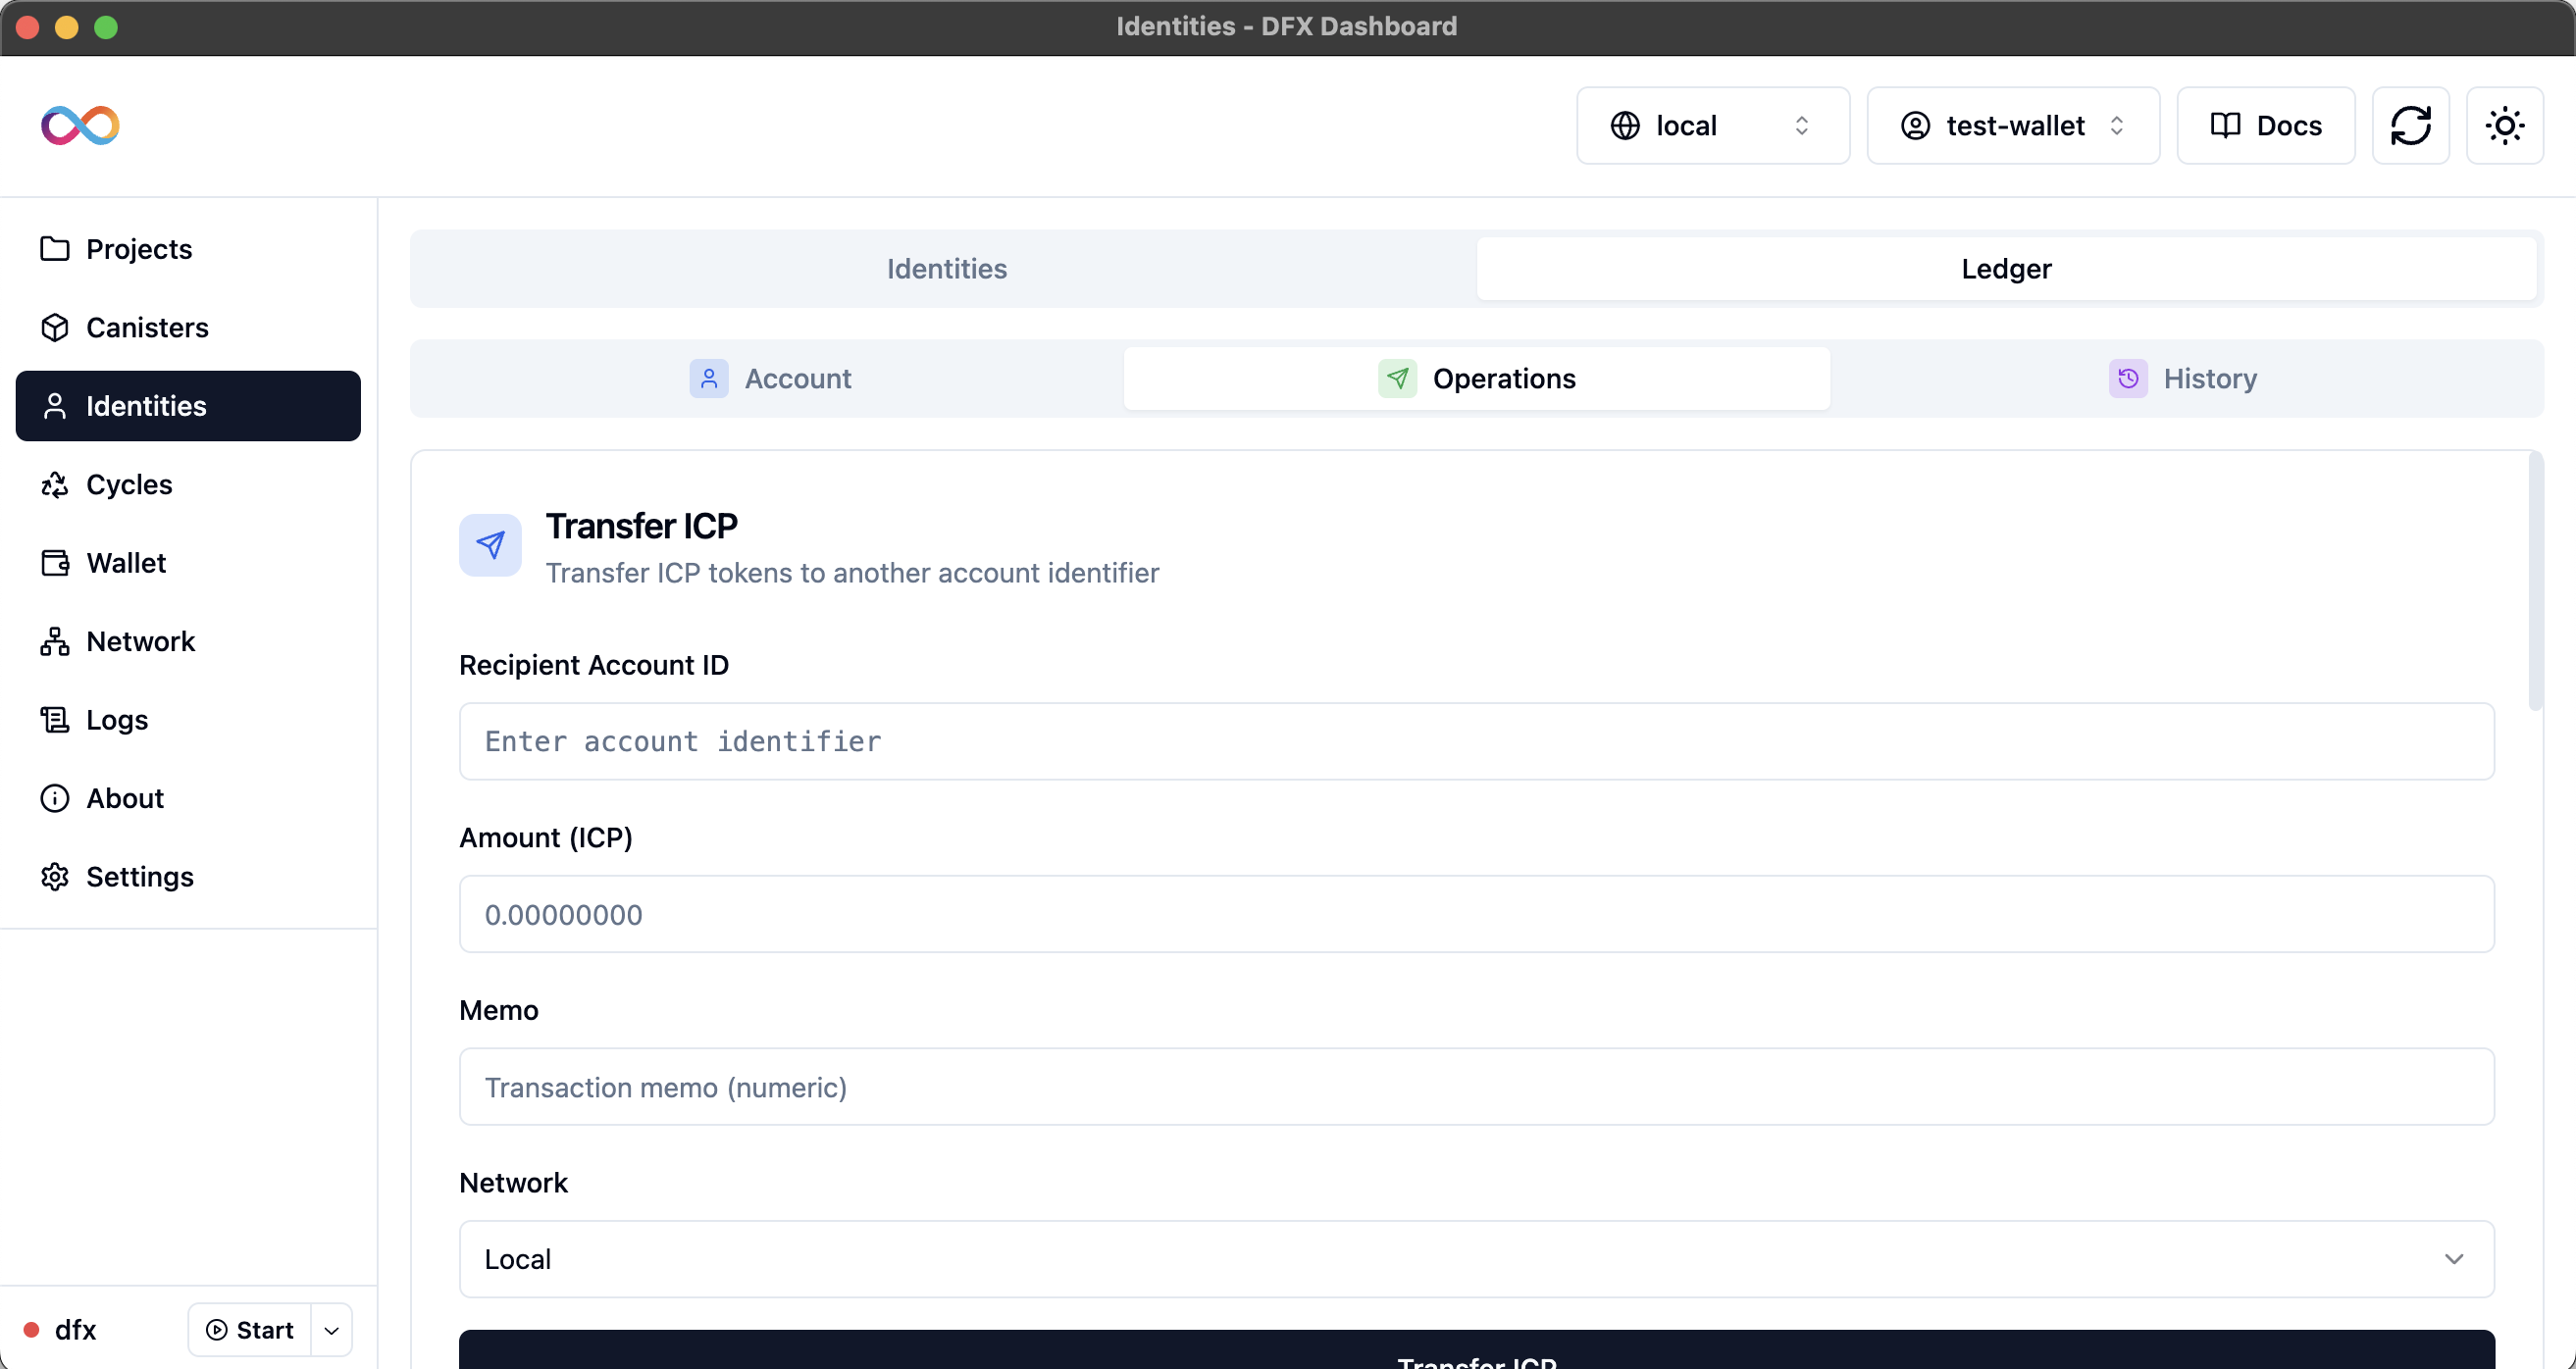
- Transfer ICP
- Create Canister
- Top Up Canister
- Fabricate Cycles
Send ICP to Other Accounts
Transfer Process:- Recipient: Enter destination account ID or principal
- Amount: Specify ICP amount to transfer (with fee calculation)
- Network: Select local or Internet Computer network
- Execute: Send the transfer with confirmation dialog
- Real-time fee calculation
- Address validation
- Network selection
- Transaction confirmation
Transaction History Tab
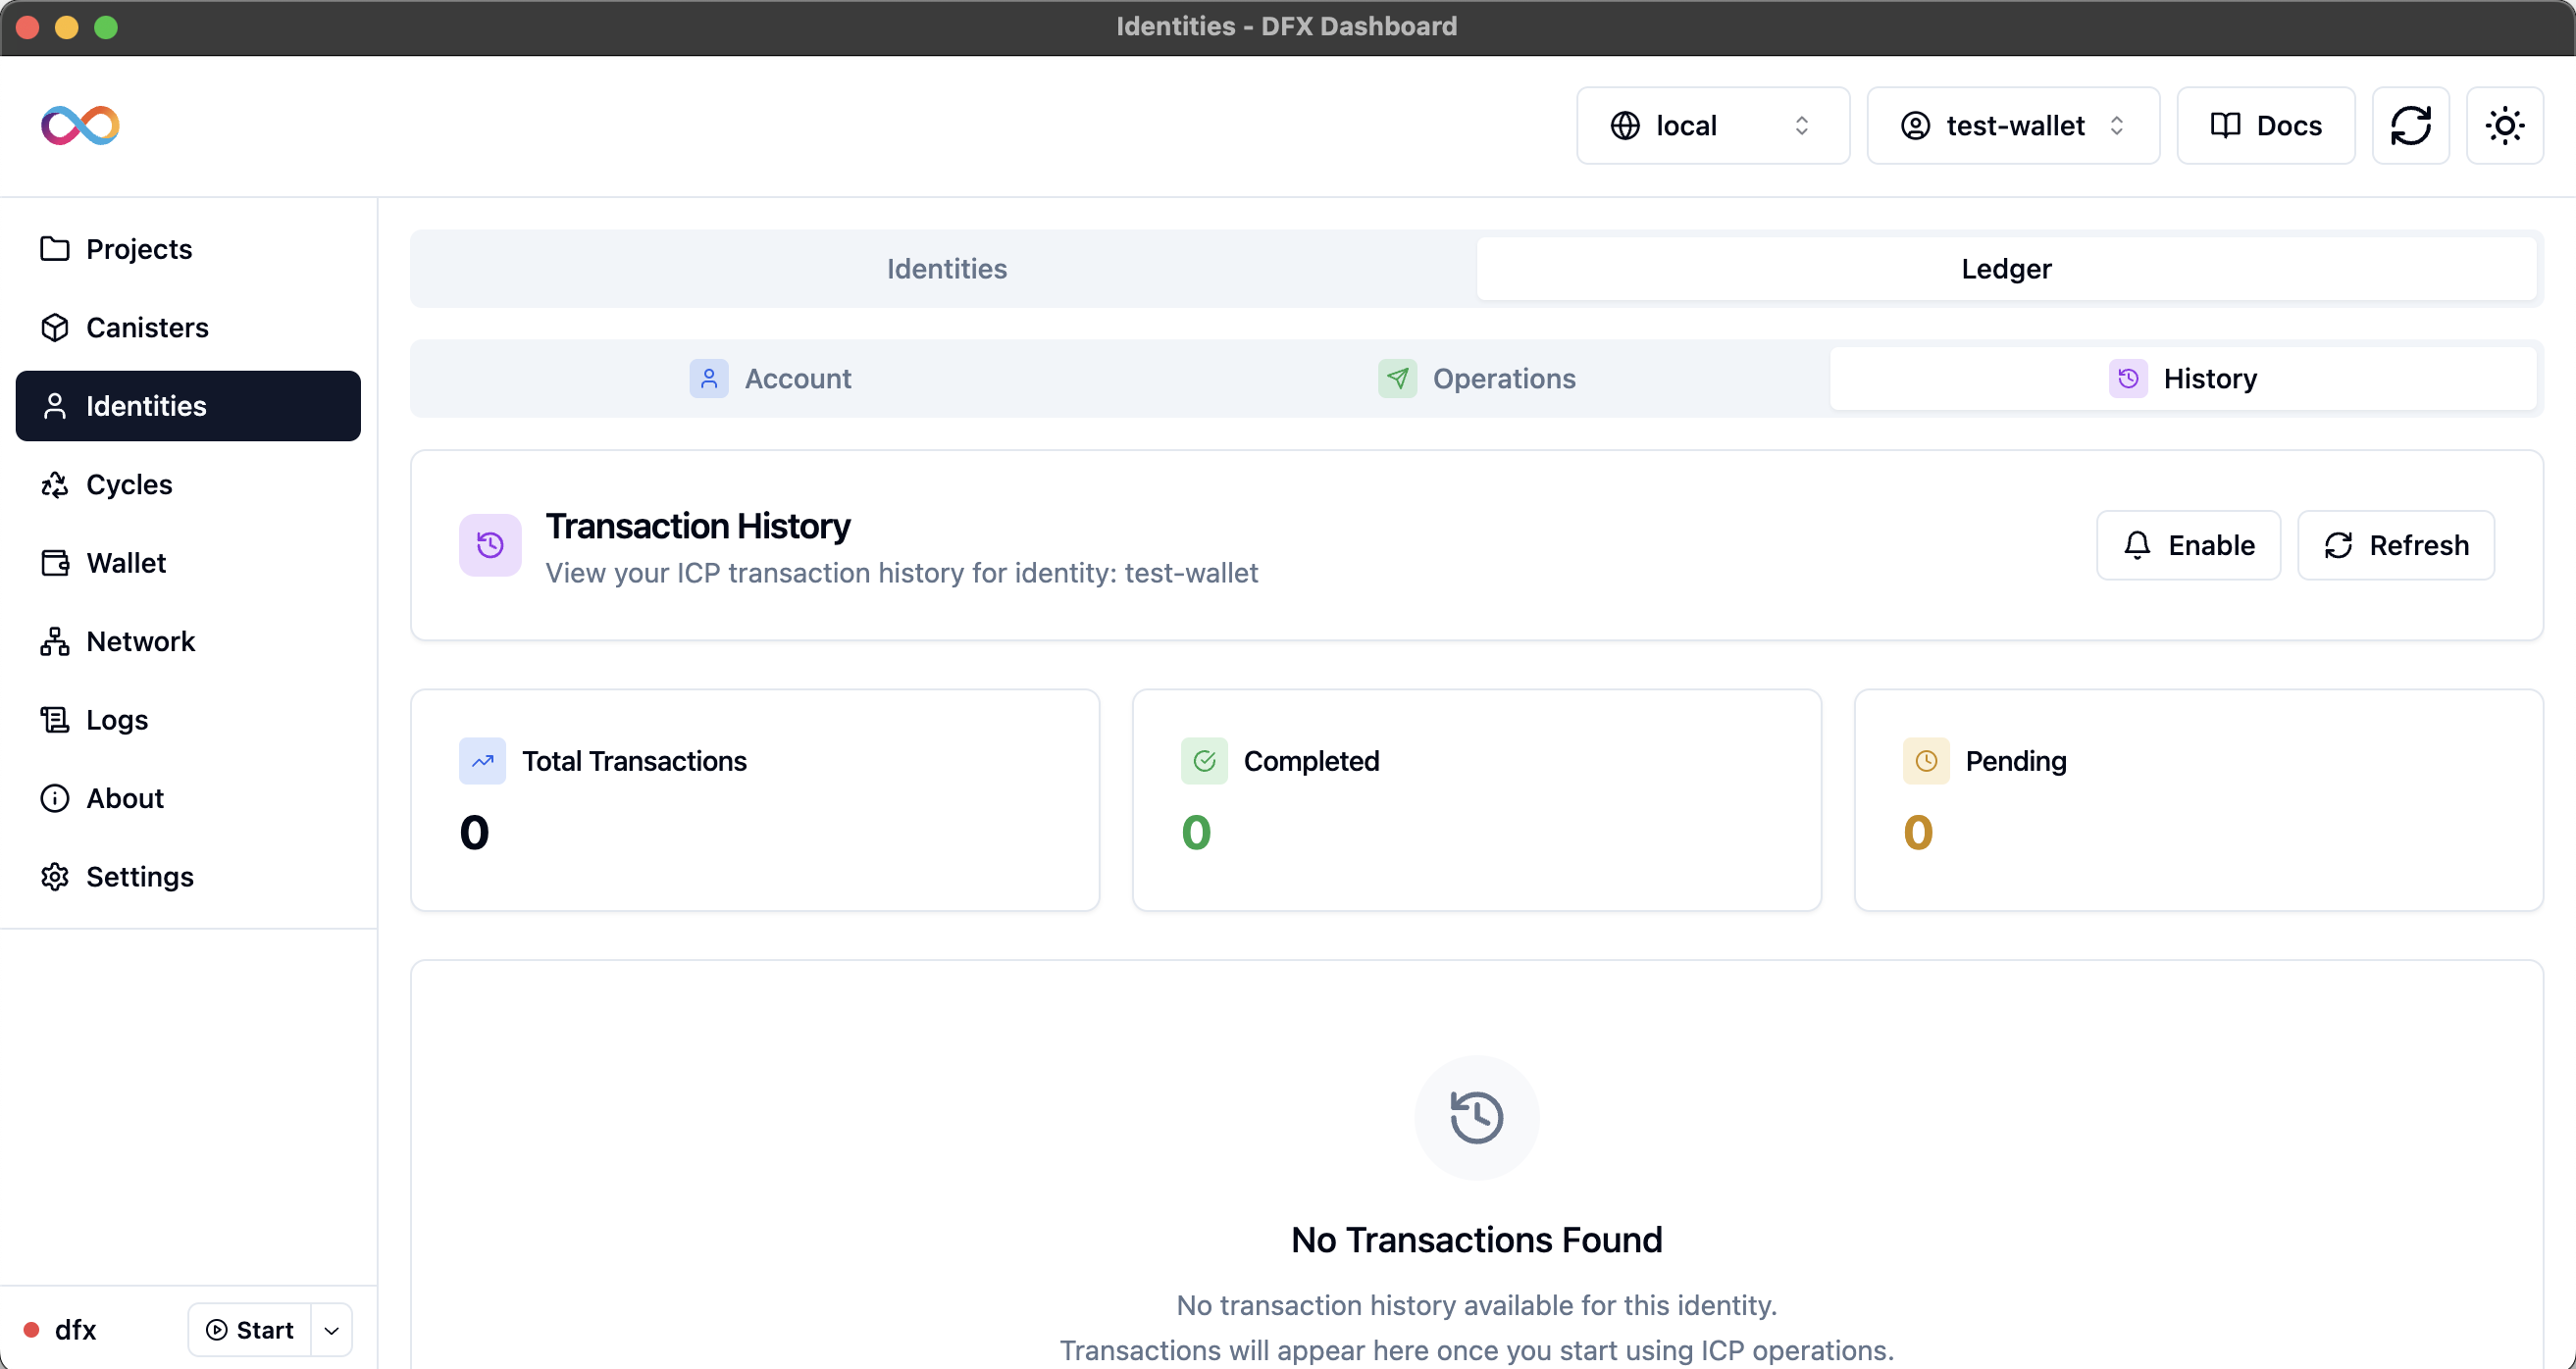
Transaction Tracking Features
Transaction Tracking Features
Comprehensive transaction monitoring:
- Real-time Updates: Fetches latest transaction data automatically
- Transaction Details: Shows type, amount, fees, and status
- Block Heights: Links to blockchain records for verification
- Search and Filter: Find specific transactions quickly
- Export Options: Download transaction history for records
Transaction Information
Transaction Information
Detailed transaction data:
- Transaction Hash: Unique identifier for each transaction
- Type: Transfer, canister creation, top-up, etc.
- Amount: ICP amount involved in the transaction
- Fees: Network fees paid for the transaction
- Status: Completed, pending, or failed status
- Timestamp: When the transaction occurred
- Block Height: Blockchain block containing the transaction
Identity Management Best Practices
Organization and Naming
Organization and Naming
Optimize your identity workflow:
- Descriptive Names: Use clear, purpose-driven names for easy identification
- Environment Separation: Use different identities for development and production
- Project Context: Consider creating project-specific identities
- Regular Cleanup: Remove unused identities to maintain organization
Security Practices
Security Practices
Maintain security best practices:
- Backup Strategy: Regularly backup important identity information
- Private Key Security: Never share private keys or seed phrases
- Hardware Wallets: Consider hardware wallets for high-value identities
- Access Control: Use appropriate storage modes for different use cases
Active Identity Management
Active Identity Management
Manage active identity effectively:
- Context Switching: Switch identities based on current task
- Verification: Always verify active identity before operations
- Session Management: Understand identity persistence across sessions
- Network Awareness: Ensure identity compatibility with target networks
ICP Operations Best Practices
Transaction Management
Transaction Management
Optimize your ICP operations:
- Balance Monitoring: Regularly check ICP balance and set up alerts
- Fee Awareness: Account for network fees in all transfer calculations
- Address Verification: Always verify recipient addresses before transfers
- Network Selection: Ensure you’re using the correct network for operations
Development Workflow
Development Workflow
Streamline development operations:
- Local Testing: Use local network and fabricate cycles for development
- Staging Environment: Test operations on testnets before mainnet
- Cycle Management: Monitor canister cycle consumption patterns
- Backup Funding: Maintain backup funding sources for critical canisters
Record Keeping
Record Keeping
Maintain comprehensive records:
- Transaction History: Regularly review transaction history
- Documentation: Document important transactions and their purposes
- Audit Trail: Maintain audit trails for compliance and debugging
- Export Data: Regularly export transaction data for external records
Troubleshooting
Identity Issues
Identity Issues
Common identity problems and solutions:Problem: Unable to create identity
- Check if identity name already exists
- Verify identity name follows naming conventions
- Ensure sufficient permissions for identity creation
- Try using a different identity name
- Verify PEM file format and validity
- Check file permissions and accessibility
- Ensure PEM file contains correct key information
- Try different storage mode options
- Clear browser cache and restart DFX Dashboard
- Ensure stable internet connection
- Try using different browser or incognito mode
- Check Internet Identity service status
Ledger Issues
Ledger Issues
Common ledger problems and solutions:Problem: Balance not showing or incorrect
- Ensure you’re connected to the correct network
- Use the refresh button to manually update balance
- Check network connectivity for IC operations
- Verify identity has been used for transactions
- Check recipient address format and validity
- Ensure sufficient balance for transfer and fees
- Verify network selection matches intended destination
- Check for network congestion or maintenance
- Verify canister ID format and existence
- Ensure sufficient ICP balance for cycle conversion
- Check network compatibility and status
- Verify canister permissions and controllers
Network Issues
Network Issues
Network-related problems:Problem: Local network errors
- ICP Ledger may not be installed on local network
- Ensure local dfx network is running properly
- Check dfx version compatibility (requires 0.25.0+)
- Restart local replica if operations fail
- IC transactions may take time to confirm on mainnet
- Check transaction status in the history tab
- Verify network congestion status
- Monitor block height progression
- Verify principal format is correct
- Check for typos in principal string
- Ensure principal is valid IC principal
- Try copying principal directly from source
Additional Resources
Digital Identity on IC
Understanding digital identity concepts and authentication
Internet Identity Specification
Technical specification for Internet Identity integration
ICP Ledger Documentation
Complete ICP ledger integration and operation guide
DFX Identity Commands
Command line reference for identity management
Security Best Practices
Comprehensive security guidelines for IC development
Cycle Management Guide
Understanding cycles and canister funding strategies
Ready to explore wallet management? Continue to the Wallet page to learn about advanced wallet operations and management.